
Call me crazy, but when I saw this old stained and worn out t-shirt that ought to go to the rag bag or maybe into the trash can, I had a lightbulb moment . . .
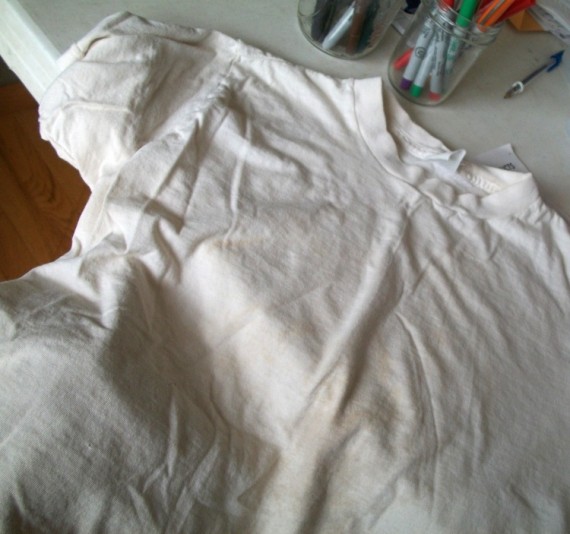
. . . I could turn this into a Tie Dye T-shirt Scarf for my girls! I mean, everything is a canvas if you just put on your thinking cap and let the creative juices flow, right? So, how does a girl turn a cruddy ol’ t-shirt into a gorgeous designer scarf? Well, now, let me show you!
1. Gather your supplies. {Confession: I was so excited to get on with this project I totally forgot to take a photo of the supplies for you. So sorry! But don’t panic, you probably have everything you need handy in your cupboards and drawers}
What you’ll need:
- 1 old (or not-so-old) and cruddy (or not-so-cruddy) t-shirt. (If using a new shirt, wash and dry first)
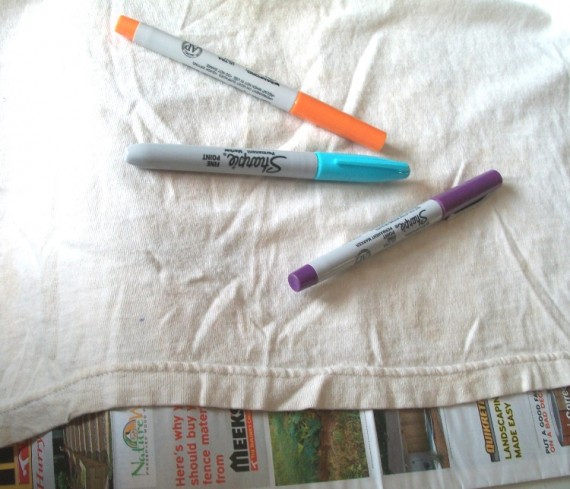
- Sharpie Markers in colors of your choice. This is the brand I recommend, I tried others with lesser degrees of success. We chose 4 colors for this project, but the choice is up to you! You’ll get varied results with different colors, brands and tip sizes so experiment. I played around using the sleeves before I got serious – that’s part of the fun!
- Cardboard, a thickness of newspaper, a sheet of plastic, anything you can place inside the t-shirt to protect the second layer and your work surface from the bleed-through of the ink. Because, don’t we all know how permanent ink leaks through to all things not supposed to be inked?
- Rubbing Alcohol
- Eye Dropper, Small Spoon or empty Spray Bottle
- A Container such as a bowl or baking dish
- A Ruler
- A Piece of Chalk (or pencil)
- Scissors

2. Place cardboard (or some protective padding) between layers of t-shirt and start designing and coloring! Color in shapes, bands, patterns, whatever on the bottom half of your t-shirt. I was hoping for a swirly-watercolor design for this project, so I sketched in circles in random sizes and thicknesses using 4 different colors. I worked in small sections, keeping the fabric taut with my fingers, building my circles a little at a time. I left white space between my shapes hoping the colors would bleed and run together. Turn your t-shirt and move the cardboard, working each section until you have your design all colored.
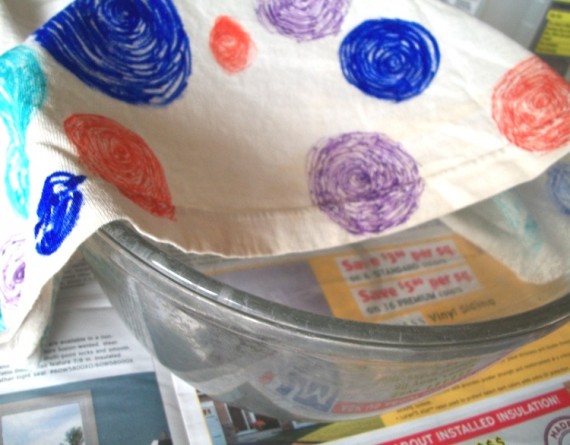
3. Place a section of your colored t-shirt over top of a bowl (or container of your choice). This allows the ink to flow freely and prevents it from pooling and soaking through to table surface. It is also best to work in a well-ventilated area. The back porch or a table out in the yard are great places to work on this project.

4. Fill an eye dropper with rubbing alcohol, drop alcohol a few drops at time onto your design. I let it drop onto the center of my circles and watched the ink move out in concentric circles, which instantly began creating my groovy design! Experiment adding more or less alcohol. Change the placement of the eye dropper for varied effects. I first used a spray bottle, but it didn’t make the ink run as much as I’d like. You could also slowly drop and drizzle the alcohol from a spoon if you didn’t have an eye dropper.
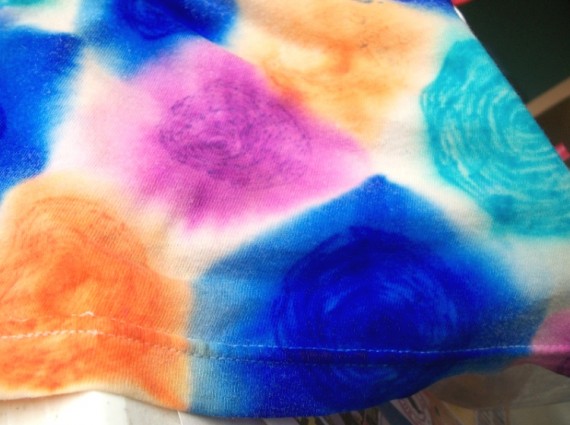
5. Move your t-shirt around and around adding more rubbing alcohol as needed. I worked with a section, then let it dry a bit before moving, to keep the sections from bleeding onto each other. Although, that might bring about a nice effect of its own!

6. Determine how wide you want your scarf to be and measure from hem up after you’ve allowed t-shirt to dry. Mark with a piece of chalk all around the t-shirt. My scarf is 9 inches wide, perfect for a child’s t-shirt and infinity scarf. You could make it wider or more narrow, depending on the look you want and the size of your t-shirt.

7. With scissors cut through one layer around the body of the t-shirt, following the chalk marks. The knit fabric of a t-shirt slips and moves and has a mind of its own so don’t lay flat and cut through both layers at the same time. And though I love using my rotary cutter, it would give uneven and possibly disastrous results with this project.

8. Toss the top of the t-shirt in the rag bag or assign it to some other creative project and then Twist and Turn your completed Faux Tie-Dye T-shirt scarf. Completed? Yes! That it! You are ready to accessorize and beautify and astound!
Everyone will be asking “Where did you find that adorable little scarf?” and you’ll say, “This? Why, it’s a custom design” wink wink

NOTE: I recommend washing in cold water and then drying in hot dryer by itself to set the colors and prevent bleeding. Then when necessary wash in cold water with like colors, air drying to minimize fading.
Want More Scarf Week Inspiration?
The T-Shirt Scarf fun has only just begun! Be sure to chomp those shark scarf teeth into each of these inspirational D.I.Y. projects hitting the blog-o-sphere today.
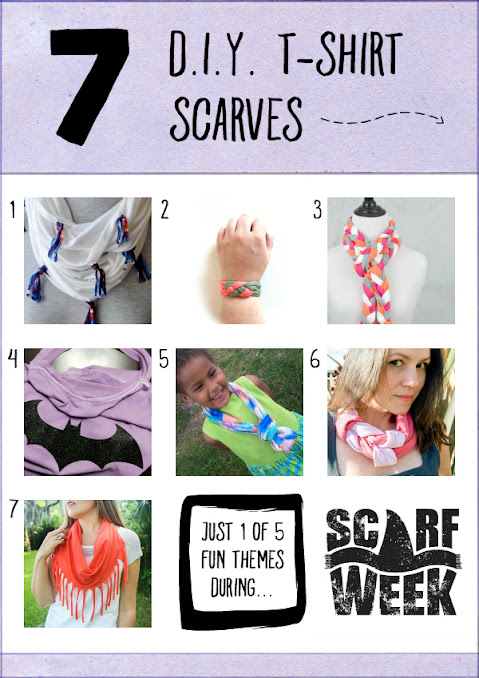
Click the images above or links below to check ’em out.
1. DIY Jersey Knit Tassel Scarf by Made in a Day
2. Knotting T-Shirt Yarn Wrist Scarves by It Was Weekend
3. Recycled T-Shirt Project | No-Sew Braided Tassel Scarf by Happy Hour Projects
4. How To Make A T-Shirt Super Hero Cape by Crafty Bonds
5. Faux Tye-Dye T-Shirt Scarf by Apron Strings & Other Things
6. DIY Braided T-Shirt Scarf by The Crafting Nook
7. 10 Minute Fringe Infinity T-Shirt Scarf by The Thinking Closet
Coming Soon….
Here’s a glimpse at what’s coming up later this week!

To access all 5 days of Scarf Week, visit our co-coordinators, Lauren from The Thinking Closet and Vanessa from Tried & True. They’ll be updating their posts with the clickable collages as they go live this week. And you can also follow along with our hashtag, #ScarfWeek2015.
It’ll be wave after wave of killer inspiration, no fish-bones about it!
And be sure to stop back here on Wednesday to see my next scarf tutorial!
Linking this post up at some these wonderful places.
Oh, I thought of a project like that as well, but wasn’t sure what to use to let the colors bleed… now I know, what to get, yeah! 😉
Your’s looks great!
Love, Elena
Thanks, Elena 🙂 I’m happy to be of help – I tried cutting the alcohol with water, not great results. stick with the full strength rubbing alcohol and you should have no problem. Hope I get to see your creations in future – what a fun week we’ll be having with all this scarf-iness going on!
Love it, Linda! And pinned. So fun for granddaughters.
Thank you for sharing in the GRAND Social!
thanks, Lisa – my granddaughter had a blast with her modeling session 🙂 I’ve missed joining in your weekly party – so glad to be back!
I’ve been wanting to try out this technique forever and I think you just gave me the perfect excuse! Thanks so much for joining us on the first day of Scarf Week!
ha ha! So glad to bring a little motivation your way, Vanessa 🙂 This will be one. fun. week! looking forward to seeing all the creative ideas our fellow scarf crafters share with us.
Yay! I, too, have seen this technique and have been eager to try it – – and after seeing your GROOVY results, I’m convinced I need to bump it up the TO MAKE list! I love how it almost looks like watercolor. Also, your little model is adorable and wears that scarf with such pride! Thanks for this tidal wave of inspiration, Linda. And for participating in Scarf Week 2015 and helping to make it such a huge success. Off to pin!
thanks, Lauren! You really MUST try it — as I worked, I almost did re-name my project ‘watercolor tshirt scarf’
Loving the scarf-tastic start to our scarf-y week!
That’s very cute, and what a great way to repurpose something! 🙂 Thanks so much for sharing at The Artful Homemaking Link-Up!
thank you, Joy 🙂 this little project was really a lot of fun, and so easy! it will be a good one for the kids to try.
Haha This is such a great crafty scarf to make… the kind I like. I never thought about being able to do that with sharpies. I’, so trying this! Looks so cool!
Pinning!!!
XO
glad you like it, Camila 🙂 I love my Sharpies! every year I stock up when school supplies are on special – be sure to pick up some awesome colors!
We made tshirts with this technique two weeks ago during vacation bible school. It was a bug hit with all the kids. They were really creative.
love that idea, Amanda. I can imagine how much fun everyone had creating their own. My Bekah decorated her own for the 4th, the tie dye effect was perfect to give the impression of fireworks 🙂
Now I know what I should do with my last old Tshirt… Also, your model is absolutely ADORABLE!
ha ha, Mackenzie – we crafters are always on the look out for that next project to use up our leftovers, aren’t we? I’ll give my little model an extra squeeze for being so perfect for this scarf – once she wore it, I knew it would never do for me to be modeling it!
What a cute idea! Your scarf turned out great!
I came over on #WorksforMe today, and I’m glad to find your site.
I added your pin here: https://www.pinterest.com/melredd/blog-link-parties-and-blog-link-ups/
Hope you have a blessed day~
Melanie
thanks so much for stopping by Melanie 🙂 this was such a fun and easy project, I hope you give it a try one day soon. and thank you for the pin!
Who doesn’t love to create with tie dye? Such fun for young and old. Thanks so much for linking up with me at #AThemedLinkup 15 for Crafts and DIY, open April 15 to 25. All entries shared on social media if share buttons installed.
Absolutely! With summer just around the corner, I think it’s time to for new projects!